How to Create a Firebase Project - Step by Step Guide

Firebase is a powerful platform by Google that helps developers build mobile and web applications easily. In this guide, you’ll learn how to create a Firebase project with simple steps and real screenshots. This article is beginner-friendly and SEO optimized.
-
Go to Firebase Console
- Open your browser and go to https://console.firebase.google.com/
- Click on "Add Project" or "Create a Project"
-
Enter Project Name
- Type a name for your project like "My App Project"
- Click Continue
-
Enable Gemini Features (Optional)
- Enable Gemini if you want to use AI features (optional)
- Click Continue
-
Enable Google Analytics
- Check the box to enable Google Analytics
- Click Continue to proceed
-
Create Google Analytics Account
- If you don't have one, select Create a new account
-
Enter Account Name and Save
- Enter a name for your Google Analytics account
- Click Save and Continue
-
Agree to Terms and Conditions
- Check the box to accept the terms
- Click Continue
-
Your Firebase Project is Ready
- Wait a few seconds while Firebase creates your project
- Click Continue to go to the Firebase dashboard


Conclusion
You have now successfully created a Firebase project. You can now connect your Android or web app, add Authentication, Firestore database, Cloud Functions, and explore many other features that Firebase offers.
This beginner-friendly guide is perfect for first-time users. Stay tuned for more Firebase tutorials and tips on how to grow your app using Google tools.
How to Create a Database in Firebase - Step by Step Guide

Complete Guide: Setting Up Firebase Realtime Database in 6 Steps
Prerequisite: Before creating your database, you'll need a Firebase project. If you haven't created one yet, follow our Firebase Project Setup Guide first.
What is Firebase Realtime Database?
Firebase Realtime Database is a cloud-hosted NoSQL database that synchronizes data across all clients in milliseconds. Key features include:
- Real-time data synchronization across web, iOS, and Android apps
- Offline support with automatic data syncing when reconnected
- Flexible, JSON-based data structure
- Built-in security and user authentication
Step-by-Step Setup Guide
Step 1: Access Your Firebase Console
- Go to Firebase Console
- Select your existing project or create a new one

Step 2: Navigate to Realtime Database
- In the left sidebar, click Build
- Select Realtime Database from the menu

Step 3: Create Your Database
- Click Create Database
- Select your database location (default is usually fine)
- Click Next to proceed

Step 4: Configure Security Rules
Important: Test mode allows open access to your database. Only use this during development.
- Select Start in test mode for initial setup
- Click Enable to create your database

Step 5: Understand the Database Interface
You'll see these key components:
- Data tree: Hierarchical view of your JSON data
- Add button (+): Create new nodes or child elements
- Database URL: Your unique endpoint for connections

Step 6: Locate Your Database URL
- Find your database URL at the top of the page (format:
https://your-project-id.firebaseio.com/) - Copy this URL for use in your application code

Testing Your Database: Sample Code
Important: Before using this code, you must replace
https://your-project-id.firebaseio.com/ with your actual Firebase Realtime Database URL.
Firebase Realtime Database Example (Legacy SDK v2.2.1)
<!-- Firebase SDK v2.2.1 -->
<script src="https://cdn.firebase.com/js/client/2.2.1/firebase.js"></script>

<script>
  // 🔴 REPLACE THIS WITH YOUR DATABASE URL
  // Format: https://your-project-id.firebaseio.com/
  var firebaseRef = new Firebase("https://your-project-id.firebaseio.com/users/");

  // Example data object to push
  var userData = {
    username: "john_doe",
    email: "john@example.com",
    timestamp: Date.now()  // Added timestamp for better debugging
  };

  // Push data to 'users' node (generates unique key)
  firebaseRef.push(userData, function(error) {
    if (error) {
      console.error("Data could not be saved: " + error);
    } else {
      console.log("Data saved successfully!");
    }
  });
</script>
Testing Tip: After running this code, check your Firebase console → Realtime Database to see the new data appear under the "users" node.
Next Steps & Best Practices
Security Rules
After testing, update your security rules:
- Restrict read/write access to authenticated users
- Implement data validation rules
- Use granular path-based permissions
Data Structure
Plan your database structure carefully:
- Flatten data when possible
- Avoid deep nesting
- Consider duplicate data for efficient queries
Need Help? If you encounter any issues during setup, check out Firebase's official support resources or leave a comment below.
How to Download Pinterest Videos Without Watermark (Fast & Easy)
Want to download Pinterest videos to your phone without any watermark? Here’s a simple 2-step method using our Pinterest Video Downloader tool — no app needed!
📌 Step 1: Copy the Pinterest Video Link
- Open the Pinterest app and select the video you want to download.
- Tap on the Share icon.
- Select “Copy link”.

🔽 Step 2: Paste the Link on Our Tool
- Go to https://pindl.blogspot.com.
- Paste the link you copied into the input box.
- Tap the download button.

✅ That’s it!
Your video will be ready to download — no watermark, no hassle. It works on all devices and is completely free!
💡 Tip: Bookmark the site for quick access anytime you want to save videos from Pinterest.
#PinterestDownloader #DownloadPinterestVideo #NoWatermark #PinterestVideoDownload #PinterestTips #VideoDownloader #SocialMediaTools #HowToDownload #PinterestTricks #PinterestSave
PINDL - Pinterest Downloader Blogger Template

PINDL is a fast, lightweight, and easy-to-use Pinterest Downloader tool built entirely on Blogger. No hosting, no PHP, and no external API required. Just copy, paste, and launch your own Pinterest Video & Image Downloader site in minutes!
🚀 Key Features:
✅ Blogger-Based – No need for external hosting
✅ No API Needed – Works independently
✅ Supports Videos, Images & GIFs
✅ One-Click Download Button
✅ Paste Pinterest URL to Download
✅ Mobile Responsive Design
✅ Clean UI & UX – User-friendly interface
✅ Fast Loading & Lightweight
✅ AdSense Friendly – Easily monetize your site
✅ Simple Setup – Copy & paste code, done!
🔗 Live Demo:
🛒 Buy Now:
Start your own Pinterest downloader website today using Blogger – no coding, no server, no stress!
Hello World
Hello World
FilmlokHD Blogger Template For Movies

FilmlokHD Blogger Template is a modern, sleek, and feature-rich theme designed for movie enthusiasts. Whether you want to create a movie downloading or streaming blog, this template has all the essentials to get started effortlessly.
Download link very soon..
Features
- 🚀 Responsive Design 📱: Perfectly optimized for all devices.
- Movie Download & Streaming Ready 🎥: Showcase your movies beautifully.
- Fast Loading Speed ⚡: Ensures a seamless browsing experience.
- SEO Friendly 🔍: Rank higher on search engines.
- Customizable Layouts 🛠️: Easy to personalize as per your needs.
#BloggerThemes, #MoviesTemplate, #Blogger
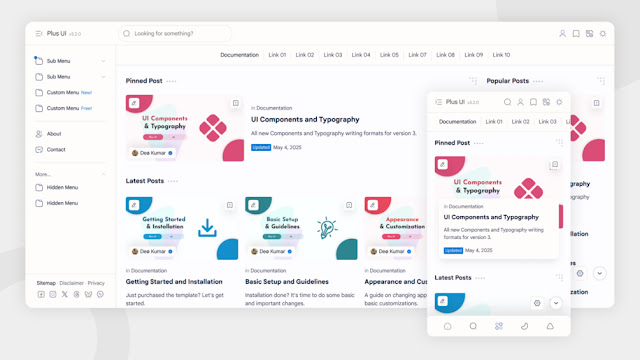
Plus UI Blogger Template V3.2.0

Plus UI is a sleek, modern, and fully responsive Blogger template designed to provide an exceptional user experience across all devices. Packed with a variety of powerful features, Plus UI enhances the aesthetics and functionality of your blog, making it ideal for anyone looking to create a professional online presence. Whether you're blogging about tech, lifestyle, or personal projects, Plus UI's clean design and easy customization options allow you to tailor the theme to suit your unique style.
Developed by Fineshop Design, Plus UI is the perfect solution for those seeking an intuitive and feature-rich template that combines simplicity with advanced functionality. It comes with comprehensive documentation to help you get started easily.